
Cleaning Grain: Post IV – Making the Cleaner Do the Job
Nobody Touched a Setting
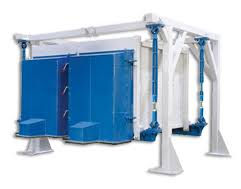
We had a Texas Shaker on a line that had been running fine. Then the diverter plate in the feed chute broke loose. Grain that should have spread across the full width of the screens was now piling onto one side. That side was overloaded. The other side was running close to bare.
Nobody was watching. The machine kept shaking, grain kept coming out the spouts, and from a distance it looked like any other day. It ran that way for weeks before anybody found it. Nobody had touched a setting. The screens, the stroke, and the air were all right where they belonged. What changed was the feed, and a cleaner fed on one side is only half a cleaner doing the work of the whole thing.
That is what this post is about.
In Post III we picked the machines and sized the system. Post III ended with a promise: once the right equipment is in, the job is not done. Steady feed, setup, calibration, operator training, SOPs, and maintenance decide how well it actually performs.
Here is the hard truth. Put two identical cleaners in two plants on the same crop, and you can get two different results. THERE IS NO MAGIC SETTING. There is a machine, the grain you feed it, and the people who set it, run it, and keep it up.
Four Levels of Control
Every cleaner in the plant answers to four levels of control. They are related, but they are not the same thing and mixing them up is where a lot of wasted effort comes from.
Level | Who owns it | What it decides |
Design | The OEM and the plant’s engineering | What the system can do |
Setup | The plant | What separation the machine is set to make |
Adjustment | The operator | How well it makes that separation today |
Maintenance | The operator and the plant | Whether it makes it again tomorrow |
Start at the top. You cannot adjust your way out of a design problem. If the cleaner is undersized, the air system cannot move enough air, or the reject conveyor plugs on a rough year, no knob fixes that. Post III covered those decisions.
I have watched operators spend years adjusting around a design problem. They got good at it. They also never got the result the plant needed, because the answer was never on the machine. It was on the drawing.
If the design is sound, the other three levels are where performance gets won or lost. The rest of this post works through them.
Feed Comes First
If I could only check one thing on a cleaner that has gone bad, I would check the feed.
Every separator in Post II is built on some assumptions. It assumes a steady load. It assumes a steady bed depth on the screen or deck. It assumes each kernel gets about the same time on the working surface. It assumes the air is spread evenly through the grain. Break those assumptions and the machine cannot do what it was built to do, no matter how well it is set.
Feed has to be right in two directions.
Across the width. If grain comes in on one side of a screen or deck and the other side runs bare, you have two machines running as one. That is what happened on the Texas Shaker. One half is overloaded and the other half is doing nothing. On an aspirator, uneven feed means some of the curtain gets too much air and some gets too little.
Over time. Steady from minute to minute. Not a slug of grain, then a gap, then another slug.
What surging does
Too much grain at once overloads the screens. Kernels pile up and never get a fair look at the openings, so good grain rides over and trash rides through. A gravity table bed gets too deep to layer out. An aspirator gets more grain than its air can handle, and light material stays with the product. Quality swings, and good grain ends up in the rejects.
What starvation does
Too little grain is a problem too, and people forget it. A thin bed leaves bare spots. Air takes the easy path through the bare spots instead of through the grain. On a gravity table, the bed breaks up and the layers never form. On an optical sorter, a ragged stream makes it harder to see and hit each kernel. Separation gets sloppy and the result wanders.
The tools
Surge bins, metering gates, vibratory feeders, rotary feeders, and controlled discharges are there to spread and steady the grain, not just move it. If a feeder is undersized, worn, or set wrong, everything behind it pays.
So before you touch the air, the screens, or the dividers, ask the question first. Is the machine running poorly, or is it just being fed poorly?
Setup: Picking the Cut
Setup decides which separation the machine is going to make. Adjustment decides how well it makes it. I said it in Post II and it bears repeating: changing a screen changes the cut. Turning a knob helps the machine make that cut.
Setup is the screens and their openings, round hole or slot. It is the pocket size in an indent cylinder. It is the recipe and the defect definitions in an optical sorter. It is how the dividers are arranged and where the recycle streams go on a gravity table. It is which machines are in the flow and which ones are bypassed.
Those things change when the crop changes, the product changes, or the customer’s spec changes. They should not change every shift.
The corn lines in Post III are the example. Same gravity tables, two customers, two setups. The switch from one to the other was planned, not improvised.
Treat a changeover like a job of its own:
• Which screens, pockets, or recipe go in for this product?
• Are they in good shape, or did they come off the shelf worn?
• Is the routing right, with nothing left open from the last run?
• What are the starting settings for this product?
• Who pulls the first samples, and what do they need to show before the line runs full rate?
Write the answers down. The next changeover goes faster and closer to right.
Adjusting Day to Day
Once the setup is right, the operator’s job is to keep the machine making that cut as the grain changes. Moisture moves. Trash load goes up and down. A new variety comes in. The rate has to come up because a train is waiting.
Adjustments do not change the separation principle. They tune the machine to the grain in front of it today.
A few rules from the floor:
• Change one thing at a time. Most of these adjustments work on each other. Move two and you will not know which one did it.
• Give it time to settle. A gravity table bed or an aspirator curtain needs a few minutes to find its new balance. Sample too soon and you are reading the old setting.
• Sample before and after. If you did not sample before, you do not know whether you made it better.
• Write it down. What you changed, why, and what the sample showed.
The gravity table sequence
In Post II, I said we would come back to the gravity table setup sequence. Here it is in general terms. Your OEM manual is the procedure for your deck, and its order and starting points come first.
1. Start with the deck clean, the slopes and deck speed at the manual’s starting points, and the dividers open wide.
2. Bring the feed in low and steady. Get even coverage across the deck before anything else.
3. Bring the air up until the bed loosens and starts to layer. Too little air and it never layers. Too much and it boils.
4. Set the side tilt and end raise so the layers spread out along the discharge edge, heavy at one end and light at the other.
5. Adjust deck speed to move the bed across at a pace that keeps the layers clean.
6. Only then set the dividers, and pull samples from each spout.
7. Bring the feed up a step at a time, letting the bed settle and sampling at each step, until the samples tell you to stop.
The deck makes the separation. The dividers only catch it. If you are moving dividers to fix a bad sample, go back to step 2.
What to watch on each machine
Post II covered how each machine works. This table is the short version for the operator on shift. The same discipline—feed first, one change at a time, sample before and after—applies to every machine on the list, including indent cylinders, spirals, and optical sorters.
Machine | Main day-to-day adjustments | What the samples tell you |
Aspirator | Air volume, gate position, feed rate | Light material left in the product, or good kernels in the air reject |
Screen cleaner | Feed rate, plus stroke and deck angle where adjustable | Fines in the product, or good kernels over the scalp |
Gravity table | Feed, air, side tilt, end raise, deck speed, then dividers | Light kernels in the product, or sound kernels in the light end |
Destoner | Air, feed rate, deck angle and vibration | Stones in the product, or too much grain in the heavy reject |
Indent cylinder | Cylinder speed, trough position, feed rate | Short material left in, or good kernels lifted out |
Spiral | Feed rate, and fingers, gates, or plates where fitted | Off-shape material in the product, or good seed in the reject |
Optical sorter | Defect thresholds, sensitivity, product flow | Defects left in, or too many good kernels kicked out |
One note on optical sorters. On most machines the reject percentage is not a knob. It is the result of the thresholds you set and the grain coming in. If the reject rate jumps, ask what changed in the grain before you turn the sensitivity down.
On most optical sorters the interface is a touchscreen or HMI, not a set of knobs. You are still changing one parameter at a time and confirming with samples; the controls just look different.
Start With the OEM, Finish With Samples
The manufacturer knows the machine. They know its operating ranges, its limits, and what it was designed to do. Their manual is where you start, and it is the procedure for startup, shutdown, and safe operation.
What the manual does not know is your grain. It does not know your varieties, your moisture, your trash, your rate, or your customer’s spec. The best setting is rarely the exact number in the book. The best setting is the one that makes your spec, run after run.
The rule is simple. Start with the OEM recommendation. Finish with the samples.
Whether you are turning a physical knob or tapping a touchscreen, the rules stay the same.
Three places to sample
Incoming. What did you start with? Without it, you cannot tell whether the machine got worse or the grain got worse.
Product. Is it meeting the spec? Has it changed since the last sample?
Rejects. What are you taking out, and how much of it is good grain you could have sold? Has the makeup changed?
Product tells you whether you met the spec. Rejects tell you what it cost to get there. In Post III we saw that half a point of good grain in the screenings can decide whether cleaning pays at all.
And one more. A change is only a change if it shows up in the sample. If you turned a knob and the sample did not move, you did not fix anything.
The sampling series covered how to pull a sample that means something. The same rules apply here.
Calibration and Drift
When grain people hear calibration, they think of scales. On a cleaner it means something a little different. Calibration is checking that a setting still means what it meant the day you wrote it down.
If the feed gate is at 4, is it still putting out the same rate it did last month? If the air damper is at the same mark, is the fan still moving the same air, or is the duct half full of dust? If the sorter is on the same recipe, does it still kick out the same defects from a known test sample?
That takes a few simple checks. A timed catch on the feeder. A pressure or air velocity reading at a fixed point on the air system. A known sample run through the sorter. The tramp metal series made the point about validation and verification. This is verification on the cleaner: proving the settings still do what you think they do.
Why machines drift
No machine stays the way it was on commissioning day. Screens wear and stretch. Ducts and filters load up. Screen cleaning balls wear and harden. Bearings and belts loosen and lose stroke or speed. Deck surfaces wear smooth. And the grain itself changes from lot to lot and year to year.
Drift is slow, and that is what makes it dangerous. Nobody notices a little change from one day to the next. Then one day the plant is off spec and nobody can say when it started.
Warning signs
• More good grain showing up in the rejects
• More foreign material showing up in the product
• Rate falling off to hold the same quality
• Operators making more adjustments to hold the same result
• Settings creeping further from the numbers in the log
When you see those, ask the question that saves the most time: has the grain changed, or has the machine changed? The incoming sample answers the first half. Calibration checks and maintenance answer the second.
Maintenance Keeps the Setup Honest
Setup and adjustment assume the machine is in the condition it was built to be in. Maintenance is what keeps that true. A worn screen is a different screen. A plugged duct is a different air system. The settings in the log only mean something if the machine behind them has not changed.
Component | What goes wrong | What you will see in the samples |
Screens | Wear, stretch, plugging, broken wires | Openings bigger or smaller than you think. Wrong size passing, or good grain riding over |
Screen cleaning balls | Hardening, cracking, loss of bounce, dusting | Screens blind over, rate drops, fines carry into the product |
Decks | Wear, cracks, plugged air openings | Uneven air, dead spots, a bed that will not layer |
Wear plates | Thinning, grooving, impact damage | Grain channels instead of spreading. Uneven feed across the machine; one side overloaded, the other light |
Air system and dust collector | Leaks, worn fan, duct buildup, loaded filters | Less air than the setting says. Light material stays in the product |
Drives and bearings | Vibration, noise, heat, belt slip, misalignment | Lost stroke or speed. The machine moves grain but does not separate it |
Wear plates and deck surfaces deserve the same attention as screens. When a wear plate thins or grooves, grain starts to channel instead of spreading. You get the same symptom as the Texas Shaker—one side overloaded, the other side bare—except this time the cause is under the grain, not in the feed chute. A smoothed deck loses the texture that helps the bed layer; the heavy and light fractions stop separating cleanly even when the air and tilts look right.
The screen cleaning balls deserve a special word because they are cheap, out of sight, and easy to forget. When they wear and go hard, the screens blind over a little at a time. The machine looks like it is running. The openings are just not there.
We learned that one in a cereal plant. A Rotex screener on the line started letting more fines through into the product. Not a lot at first, and the rate slipped a little at the same time. The operators chased it the way anybody would. They backed off the feed and checked the settings. It would get better for a day and then drift back.
When maintenance finally pulled the screens, the answer was sitting in the trays underneath. The balls had gone hard. Some were cracked. They were lying in the trays instead of bouncing up into the screen, and the screen had blinded over a little at a time. New balls and clean screens, and the machine went right back to making the cut.
The balls cost next to nothing. The weeks of chasing settings cost a lot more.
Build these checks into the PM schedule on a calendar, not when somebody gets around to it. And lock out before anybody pulls a screen, changes balls, or reaches into a deck. We will cover the safety side properly in Post V.
SOPs, Training, and the Record
Without documentation, every shift develops its own cleaner settings. Then nobody can say which one was right.
The SOPs do not need to be long. They need to be used.
Startup. Walk the machine. Check screen condition, magnets, and the feed system. Verify the air. Confirm the setup matches the product you are about to run. Pull first samples before you bring it to full rate.
Running. Product and reject checks on a set schedule. Calibration checks on a set schedule. Every adjustment written down with the reason and the sample that followed.
Shutdown. Clean out. Inspect. Write up anything that looked wrong so the next shift and maintenance know about it.
Training
A new operator should not learn the cleaner by turning knobs until the sample looks better. Teach the four levels. Teach feed first. Teach one change at a time and sample before and after.
And decide who is allowed to change what. Adjustments belong to trained operators. Setup changes, like screens, recipes, and divider arrangements, should go through whoever owns the product spec.
The record
The shift log is the most valuable tool on the cleaner. For every run it should show the product, the setup, the settings, and the sample results. That record gives the next shift a known starting point. It also gives you the history you need when you are trying to figure out whether the grain changed or the machine did.
The Bottom Line
Design decides what the system can do.
Setup decides which separation it makes.
Adjustment decides how well it makes it today.
Maintenance decides whether it makes it again tomorrow.
A cleaner does not know the crop, the customer, or the spec. It responds to the grain you give it and to the way it is set, adjusted, and kept up. Check the feed first. Start with the manual and finish with the samples. Write down what worked.
In Post V we take this further: running the cleaning line safely, holding quality, and getting the same result shift after shift and year after year.
What is the strangest thing you ever found when a cleaner quit making the cut? Was it the grain or the machine? Tell me in the comments.
Thank you for reading.
Regards,
Grain Guy Fifty


Comments